Let us start to make a good book drawing. Then repeat this for the number of books you want.


The black base should be on the bottom, with everything else on top of it.

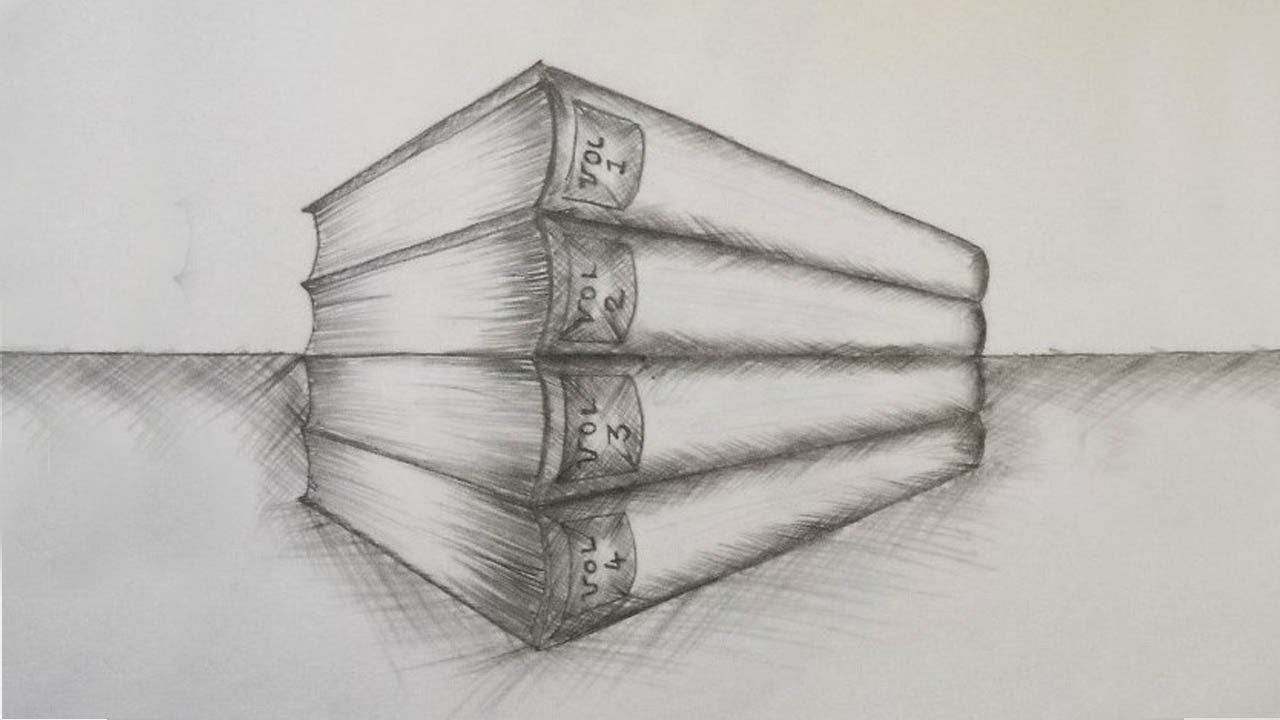
Stack of books drawing step by step. How to draw a stack of books | drawing for beginner. Show a stack of book figures arranged vertically for. Draw the cover of the second book.
Sorry it's been so long since i last uploaded a video, i've been in college and it's been crazy getting settled in and starting classes at a ne. Draw the image toward the bottom right corner of the sheet of paper so it’s visible when you’re flipping through the book later on. Start off by drawing a diamond shape for the cover of the first book.
If you want to draw stacked books, just follow along with these four easy steps: This tutorial is from an old book. Check back over the form of the entire stack when outlining the final book to see if it matches the rest of the books.
Using two straight lines, draw a backwards letter l parallel to the bottom and edge of the cover. This image will be the first sequence of your flipbook animation, so draw whatever you want to be the starting point. Change the blending mode of both shadows to multiply.
Draw a diamond to form the cover, with short, curved lines descending from each corner. Draw a second book resting atop the first. Yes in this video i will show you how to draw boo.
Click any image below to enter the gallery mode. Now draw two more logs horizontally, making the. Next, draw the currency strap, also called the currency band or bill strap.
Draw cubes & boxes with easy step by step drawing instructions step 1. At this stage you can easily start over if you have to. Draw a letter ‘v’ like shape at the top of the shape.
Pinterest / search results for stack of books liked on polyvore featuring fillers, drawings, backgrounds, doodles, books, quotes, text, saying, scribble and phrase. Finally, draw shadows for the reader and the stack of books. Then, connect these lines using two straight lines.
Add detail to the cover of your book. Drawing of a book stack can be done just as easily. You now have the basic three dimensional outline of the book.
Start by drawing three log shapes with the top side curved in and the bottom of the log curved out. All the instructions are already compiled in a step by step online lesson how to draw a stack of books. Use a pencil to draw an image on the bottom sheet of paper in the stack.
Then, connect these lines using long, straight lines, completing the outline of the book. Do a slightly indented line at the top of each u to represent the pages. Notice that the lines of the top and bottom of the page are roughly parallel, and the side of the page almost straight.
Draw another straight line along the spine, from the top of the cover to the l shaped line. They want you to do steps #1 through #3 again…then erase almost all of the lines that you did for step. Draw three curved lines to outline a wavy, partial rectangle shape.
Now draw a few more pages inside the book, the same was as you did int he previous step. Draw the second square above and to the left of the first square. Check out and enjoy doing each of the steps that will surely develop your art skills.
First, decide how many books you would like in your stack and starting from the bottom draw a elongated u on its side. How to draw stacked books. Now draw a sideways number ‘7’ shape on either side of the shape as seen above.
This is the time to make changes in your outline and to make sure the depth of the drawing looks correct. Draw a pair of parallel lines across the top of the bills. Draw a button by creating a #0b0e10 ellipse, and adding three #3e4145 nodes in the middle of it.
Complete the line drawing of the first book. How to draw books, step by step, drawing guide, by dawn.


0 komentar:
Posting Komentar